BLOG

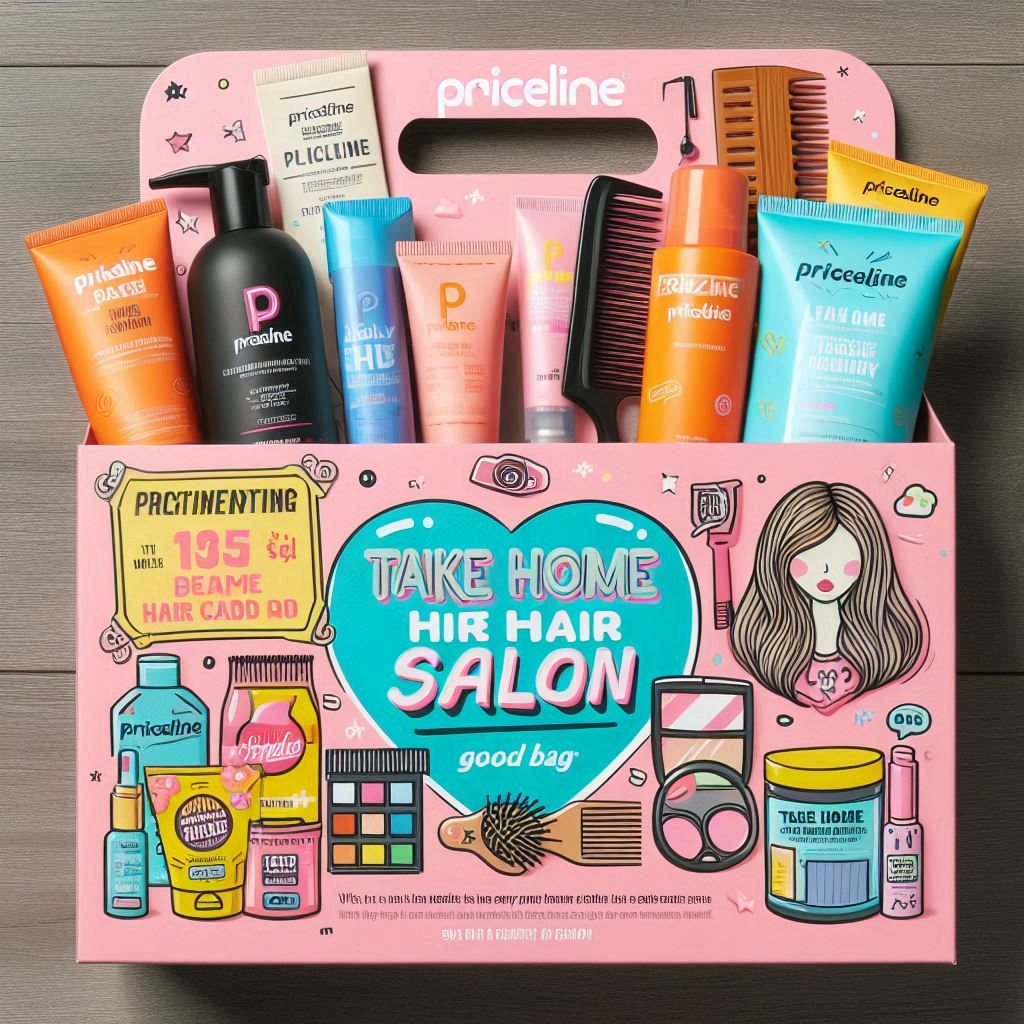
Priceline Take Home Hair Salon Goody Bag

Priceline Take Home Hair Salon Goody Bag

I couldn’t stay away from Priceline for long and when I saw the offer of “bringing the hair salon home” it took me less than a minute to decide what I wanted to buy. I apologise for being a bad influence on your wallets but this is an amazing collection of hair goodies that I couldn’t resist.

In order to qualify for the bag you need to spend over $40 on the participating hair brands in the pack. The value of the bag is over $185 so it’s the gift that keeps on giving. I bought some scunci hair twists and hair ties because I have wanted to try the twists for a while and I always need hair ties.

Next up I got two of my favourite John Frieda products, the Fly-Away frizz tamer and the Precision Colour Foam in shade 5N.
This ended up being just above $40 thanks to a special 10% off promotion for Priceclub card members in store. The stylish black bag I received was heavy. Really heavy and my expectations were grand.
Here is a list of what I received. All products are full-size unless stated otherwise.
– Fullsize John Frieda Frizz-Ease Dream Curls Style Starting Shampoo
– Napro Super Soft Colour Shine Shampoo
– 2 X Wella Balsam Protection & Shine Conditioner
– Models Prefer Professional anti static carbon tail comb
– Revlon Colorsilk Hair Colour voucher. You get to pick the colour which is just fabulous.
– Scunci expandable ponytailer
– Alchemy 24 hour intensive moisture leave-in conditioner
– Apivita Porpoline shampoo with almond & honey (sachet)
– Edward Beale Pure Argan Oil
– $3 voucher off any Frizz Ease Conditioner
– John Frieda Root Awakening Health Boosting Leave-In Conditioner
– Final Net Superhold Salon Hairspray
– Cedel dry conditioner (travel size)
– Klorane dry shampoo (travel size)
– Elvive Colour-Protect Deep Repair Treatment
– Lee Stafford Flat Iron Protection Shine Mist
– John Frieda Mirror
– John Frieda hood. I am guessing it can be used as a hairdrying turban?
I am really excited about my new goodies and it really feels like I have a hair salon at home now.
Did you snap up this offer yet or are you going to?
It is available from 10th – 21st May, just FYI.
Remember, there are no excuses for bad hair days now
Shellac

Shellac

Last year I jumped onto Shellac pretty quickly because I heard so many raves from girlfriends and I loved the idea of my nail polish not chipping too quickly. What made me stop getting it was that I wanted to change my colour more often and also the process is a little time consuming. For Christmas I gave a voucher for Shellac and got one back from my bf’s sister so we organised to go last Thursday. My nails were in desperate need of a good file and shape because in my experience shellac makes your nails stronger (not like acrylics) I wanted them to get nice and long with no chips or splits.

When I first started having Shellac manicures done there were not many choices of colour but I saw that a lot of new ones had been launched since I last had it done. I knew I needed a neutral colour because of work and I don’t mind a pretty pink so because you can layer shellac colours I got one shade of Strawberry Smoothie and one shade of Romantic. They are both different shades of pink.
I love the nail salon I go to. Before I moved apartments I lived 50 metres away but now I live 15 minutes away so I actually make appointments before I rock up. The ladies & the 1 man that works there are so friendly and they all do a great job. The boss is the best though and she usually does my Shellac and did so again this time. Before shaping my very inconcistent nails I was asked if I wanted them round or square and I asked for something in between and I am so happy with the shape, it truly looks great. After shaping and manicuring a base coat is applied on one hand and you then put your hand into the uv light box for 20 seconds whilst the other hand is based up.
This process is repeated so layer 1 and 2 needs 120 seconds each per hand and the top coat needs 180 seconds to dry. A handcream is then applied and your nails are good to go. There is zero drying time!
I am so happy with the result and even now a week later my nails still haven’t chipped. My nails are also looking very glossy!
At night time I apply OPI’s  Avoplex cuticle oil on the nails and the nail bed so that they are moisturised and don’t dry out. I definitely think this assists in reducing the chip-factor.
What I don’t like about Shellac is how long it takes to remove it because your nails have to be soaked in nail polish remover and then the layers split and can be removed. I won’t do Shellac after this again I think because I simply don’t have the time and I have too many new OPI nailpolishes I need to try.
The cost for a manicure is $20 at my local place and if you do shellac they add $18 on top. For shellac removal it costs $5 although they don’t always want me to pay it (even if I offer). I guess it pays to be a regular client;)
Always remember that because UV lights are used to dry your nails, use a handcream which contains SPF to protect your hands from the rays before you come to the salon.
Have you tried Shellac? Are you in the Yey or Ney camp?
Fighting Pores with Benefit and Origins

Fighting Pores with Benefit and Origins

It may sound silly but I didn’t actually know I had pores until about a year ago when I discovered them at the Benefit counter in Myer. My pores are actually hidden by the freckles on my nose but that doesn’t make them any less annoying. Pores will never go away but you can reduce their appearance and it doesn’t need to be very hard. 


I have written before about how I use the Clear Improvements mask from Origins twice a week. The charcoal mask helps with reducing the appearance of pores and clearing up your skin.

Next up is the product I use to cover up the pores, the Porefessional from Benefit Cosmetics which is a pro balm and acts like a primer on top of your skin. I have found that it can dry out your nose a little so make sure your nose is well-moisturised.

This is what the products look like; Clear Improvements is obviously black and the Porefessional is a light pink so that it can match any skin tone.
This has improved the look of my pores greatly but I am always on the hunt for new tricks so please let me know if you have any other tips in the “Pore-Fight”.
P.S. If you buy Benefit products directly from their website, and spend over USD125, they will give you free shipping and 2 small samples. Enjoy xx
Do You Mousse?

Do You Mousse?

Mousse usually brings back bad memories from the eighties and it used to be something that created semi-hairstyles like Cam Diaz in Something About Mary. However they have been re-invented and when I recently took stock of my hair products I found three hair mousses lying around, all from Schwarzkopf. This is one of the reasons I need to do Project 50 Pan. Mousse used to make my hair even more tanglier but thanks to the Tangle Teezer, this is not an issue anymore.

The Ultimate Styling Mousse is a 5 on the ultimate hold scales, whereas the other two are a 4 in maximum hold. It features a keratin hair filler and UV filter to protect your hair whilst making it stronger and fuller. The scent is very pleasant and not chemical at all. The Heidi’s Heat Styles Mousse features heat protection (perfect before a blow dry) and gives a 48 hour hold and volume. I currently have it in my hair and it is still full and bouncy and it’s been two days already. The scent is floral and suits its pink packaging to a tee. The Volume Power Mousse gives volume and lifts your hair at the roots to make sure that the hair looks fuller and very naturally styled. I usually put it in my hair, place it in a top knot and after a few hours I am left with gorgeous curls with no effort. I love the scent of this mousse and it will leave your hair smelling super nice!

The most important thing with mousse is to not apply too much. Since my hair is short and fine I usually apply less than half of this mousse snow ball I am holding in my hand. Try and not apply any around the roots of your hair to avoid greasiness.

When you buy a mousse I would recommend looking for one that suits your hair type and what you want to achieve. If you want to style your hair a lot, look for something with a heat protectant in it. If you just want added volume, choose a volume enhancing mousse. The funny thing is that mousse has gone from not being on my radar, to something I use several times a week.

Do you mousse? How do you style your hair?

Sally Hansen Digital Nails

Sally Hansen Digital Nails

This morning I wanted to try my brand new Sally Hansen Diamond Shine base and top coat which I received in December’s GlossyBox. I also had a Sally Hansen Hi-Definition Nail Colour in the shade Digital 06. It’s really hot pink and fun!

I really like that the base and top coat is combined as it streamlines the process. I did find it hard to apply the nail colour because the brush is quite long. It was difficult to not either use too little polish or too much. I do think I found the right balance but I’m not a fan. I am too used to OPI & Chanel’s brushes. I used two coats of Digital and the result was really good.
Now the name Diamond Shine doesn’t lie, your nails will be very very shiny. It was actually hard taking photos of them without too much glare appearing. The main problem I experienced was that 4 out of 10 nails had air bubbles which I really don’t like. I haven’t had bubbles in my nails for a long time so it is either the top coat or that my apartment was really warm when I applied the top coat so that my nails didn’t dry properly.
Can you spot the air bubbles? Overall I think I will be using the Diamond shine as a base coat only and my usual OPI Rapid-dry top coat to make sure I get no bubbles.
What’s your favourite nail polish brand? What colour are you rocking on your nails at the moment?
How to conceal a pimple which has its own postcode

How to conceal a pimple which has its own postcode

Yesterday morning I woke up with a very noticeable pimple on my chin. It’s not the first time it has happened so I had a few tricks up my sleave. I also called Bronzalicious straight away and booked in for another Light Therapy facial.

I knew I had to use an arsenal of my favourite products (new and old) in order to feel comfortable in public.
The night before I had suspected a pimple was coming so I applied a little of the Origin’s Out of Trouble 10 minute mask to work overnight. In the morning I cleansed my face, moisturised and applied a thin layer of Dr Lewinn’s Medic Spot Clear Gel and allowed it to sink in for a couple of minutes. I then put a little of Garnier’s roll on concealer on my finger tip and gently pressed it on the problem area. Afterwards I applied my daily Mineral Foundation by Kit Cosmetics over my whole face including on the pimple. I also wanted to make sure my lips were properly moisturised so I applied one of my all time favourites, Jurlique’s Love Balm. It can also be used as an eye shadow primer or as a cuticle balm. To get some colour in my face I tried my new toys, the Mineral Illuminators from Face of Australia. I used the pink one as a blush and the bronze as a highlighter on my cheeks.
Crisis averted and I was now glittering more than your average Christmas tree. It is always good to highlight a bright area on your face so that it distracts from the pimple.
What’s your secret to covering up? Do you panic or ignore it?
Waxaway Review

Waxaway Review

A couple of weeks ago I received a newsletter in the mail from Primped about a Waxaway giveaway. The first 200 to click like on facebook would receive a pack of products. I was one of the lucky 200 and I have finally tried the products.

The pack contained a Precision Wax Wand, a Bump Eraser, an After Care Lotion, a Salon Wax and a GRIP tweezer which has a handy little brush at the end for the brows. Got to love products with more than one function.

First up, the Wax Wand which won the Glosscars 2011. The instructions were very thorough and you have to twist and twist the wand until it came out. It also contains 20 wax trips and 2 after care wipes.
The instructions advised that the strips can be used up to 10 times each but I would say throw it away after you have waxed, you don’t want to keep a half-used wax strip for 3 weeks. I tried it in the lip area and I thought it worked very well. It didn’t hurt and the after care wipes were very calming and I wish there were more of these in the pack. One tip for the application, make sure you don’t use too much wax, that the area you are waxing is clean and don’t roll out too much wax at once.
I will definitely use the wand again.
Next up it was Salonwax time. It contains a wooden spatula, the pot of wax and instructions.
According to the instructions you have to place the pot in the microwave on high for 2 minutes. When it is finished, leave it in for 3 minutes and then take it out. When I checked back after 5 minutes nothing had happened. The pot felt warm but the wax wouldn’t move.
I repeated the heating and this time it was quite hot and the wax was as honey-like as it should be according to the experts. It is really quite pretty!
When twisted around it looks like a sundae-swirl!
I spread out a 10cm*3cm size of wax on the front of my leg. My left leg is always more sensitive to waxing than the right (does anyone else have this?) so I went for the right leg to do the test. It is really easy to spread out and as per the instructions the wax should be removed when it’s still soft, do not let it go fully set because you will have a waxing-disaster on your hands. I started removing the wax and it was really really painful. I guess my pain-treshold is lower when I am inflicting pain on myself. It is different in the salon for sure. I therefore only did that little area on my leg so it looks quite weird at the moment. I am too much of a wuss to try it again. Thankfully the after-care was included.
I have used the bumperaiser before on the bikini line and it truly works! On my leg I used the After Care Lotion and it smells amazing (of mango & which hazel which is a marvellous calming ingredient) and it truly helped settle the leg area. It is just divine.